Limited time offer: Save on planners!
Best Way to Make Your Own Digital Planner
Discover the best way to make your own digital planner with our comprehensive guide. Personalize your planner effortlessly for 2024, 2025, and beyond. Start building your custom planner in under 2 minutes here!
DIGITAL PLANNER
11/14/2024
Ever thought about creating your own digital planner? Let’s face it—finding a planner that perfectly fits your needs can be tough. You either end up with too many sections you’ll never use, or not enough room for what matters most. That’s where making your own planner comes in. You get to control every aspect—from layout to features. And here’s the best part: with digital planners, the options are endless.
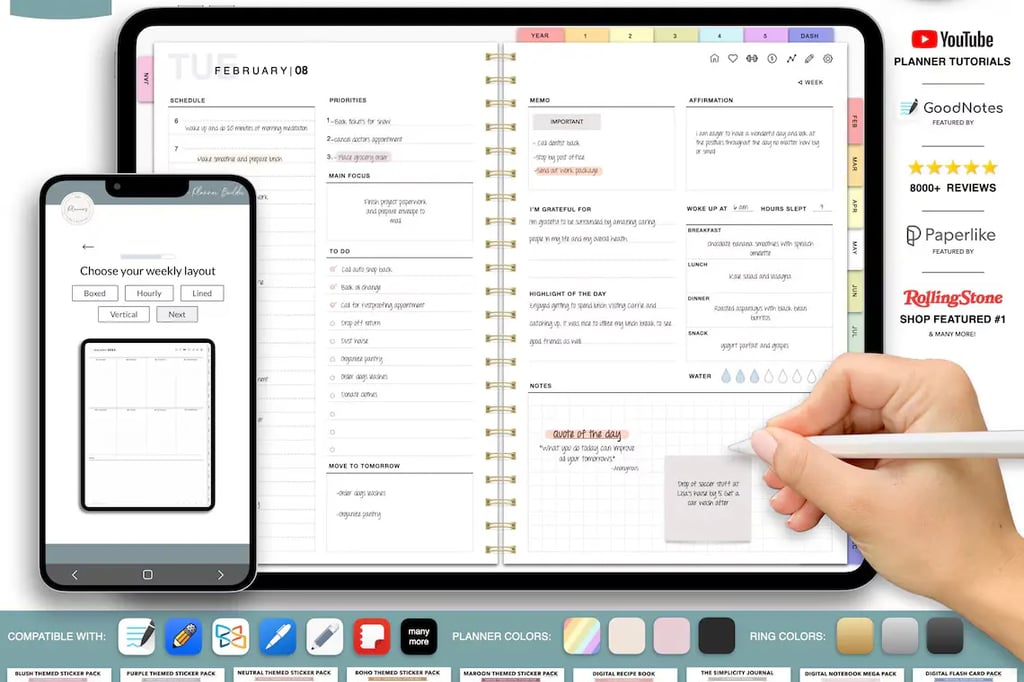
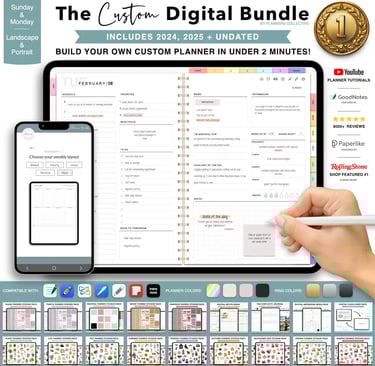
In this guide, we’re going to break down every step you need to know for creating a digital planner that feels like it was made just for you. Ready to jump in? If you're looking to save time, you can also check out this ready-to-customize digital planner for 2024, 2025, 2026, or even an undated version that’s perfect for any time! Build your own planner in under 2 minutes!
What is a Digital Planner?
Think of a digital planner as your regular planner but on steroids. It’s not just a place to jot down dates—it’s an interactive, versatile, and reusable tool for organizing your life. You can add text, colors, and links, drag and drop elements, and even track your goals digitally. With apps like GoodNotes, Notability, and Notion, digital planners become powerful, customizable organizers that can live on your tablet, phone, or computer.
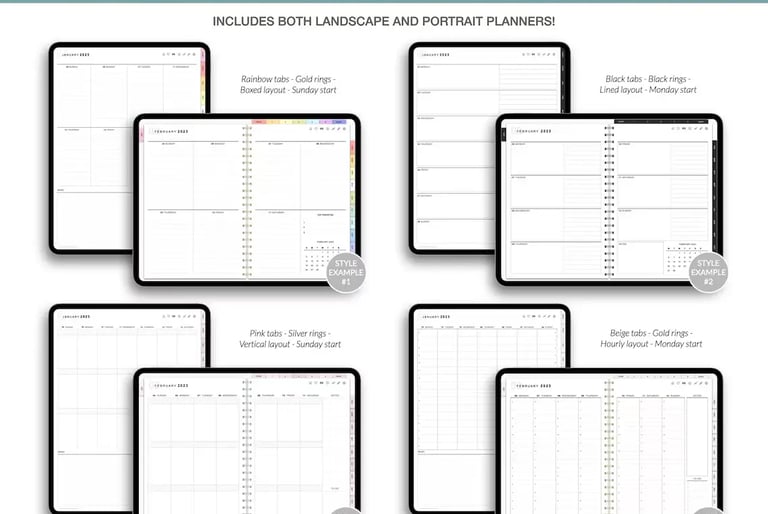
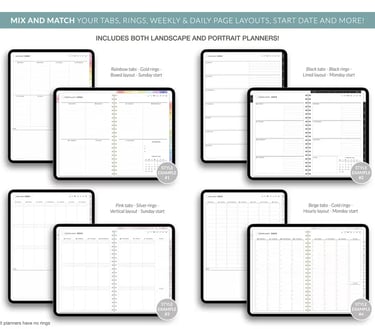
Digital planners have taken off because of how adaptable they are. Rather than being tied to a single format, they can morph to meet changing needs. Want a section for tracking habits? Add it. Need a new layout each month? Easy to do. And if you don’t have time to make one from scratch, you can grab an all-in-one customizable planner that’s ready to go right here.
Why Create Your Own Digital Planner?
If you’re like me, you’ve probably tried a bunch of planners and still felt like something was missing. That’s because no two people organize their lives the same way. Here’s why creating your own digital planner might be the best choice:
Customization: The biggest advantage is flexibility. You can adjust every part to make it suit your life. Want a weekly page with only three big sections? Go for it!
Creative Freedom: Making your own planner is also a chance to get creative. You can design pages that inspire you and fit your personality. Add colors, fonts, and images that make you want to keep using it.
Cost Efficiency: Let's be real, some planners can cost a lot. Creating your own can be more affordable, especially if you reuse it over multiple years or tweak it as needed.
Efficiency and Focus: When you create a planner tailored to your needs, it’s easier to stay focused and productive. The layout flows the way you think, making it faster to plan and track progress.
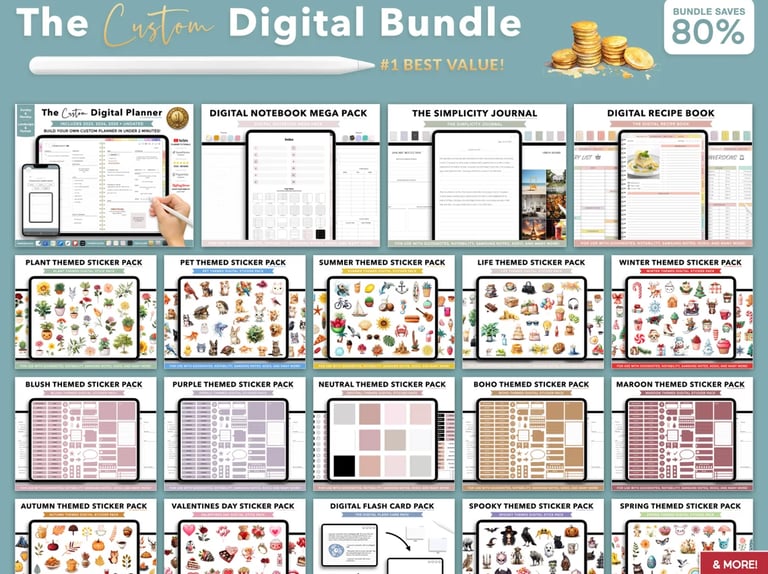
If creating sounds overwhelming, there’s always an option to start with a fully designed template. Check out Build your own custom planner in under 2 minutes!—it’s all set up, customizable, and covers everything you might need.
Essential Tools Needed to Create a Digital Planner
To build a digital planner, you’ll need some tools. Here’s a breakdown of what you might use:
1. Digital Planner Apps
GoodNotes: Known for its flexibility, GoodNotes is a top choice for digital planners, especially on iPad. It’s great for handwriting, adding stickers, and navigation.
Notability: Notability is another iPad favorite. It’s similar to GoodNotes but has additional features like audio recording, which can be useful for keeping meeting notes.
Notion: Notion is more like a customizable digital workspace than a planner. It’s cross-platform, so you can access it on any device. The flexibility in layout and linking between pages makes it ideal for building complex planners.
2. Design Software
Canva: Canva is beginner-friendly and perfect for making visually appealing planners. You can easily drag and drop elements, add icons, and customize fonts.
Photoshop: If you have design experience, Photoshop offers precision and control over every detail, which is great for making unique layouts.
Keynote or PowerPoint: Both are surprisingly useful for creating planners. With templates and easy editing tools, these apps are a go-to for those who prefer not to use design software.
3. Graphic Elements and Templates
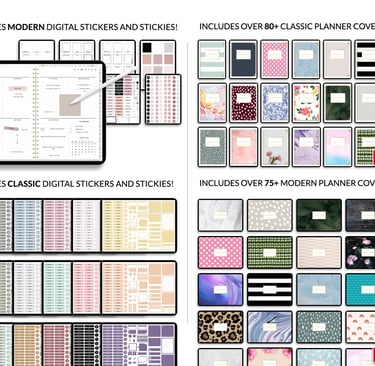
Stickers and Icons: Sites like Etsy and Creative Market offer pre-made stickers and icons that you can add to your planner for visual appeal.
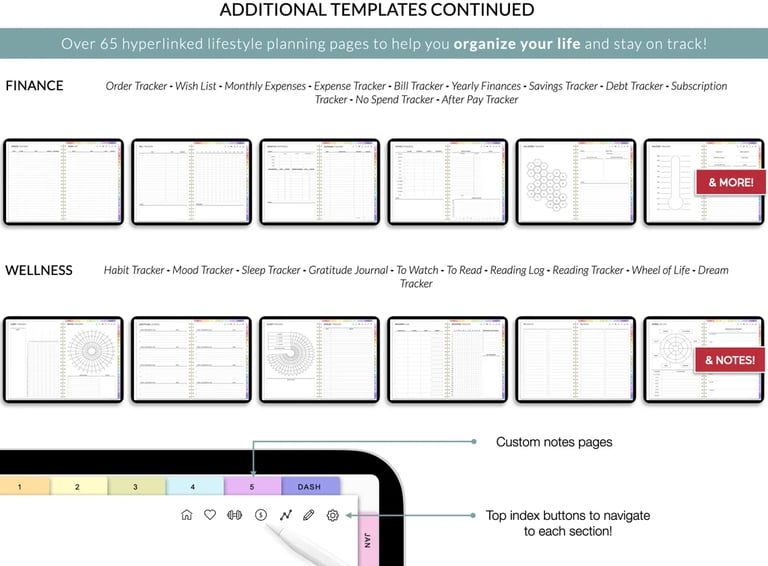
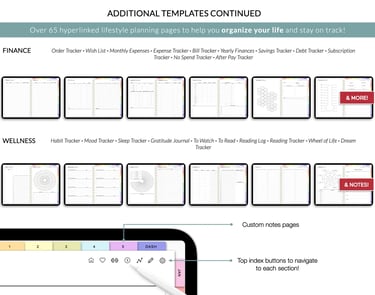
Page Templates: Templates can be lifesavers! They’re pre-designed layouts that you can modify, add to, and reorganize. You can find an extensive selection on our store.
Using the right tools can make creating a digital planner much easier and more fun. You don’t have to start from scratch if you have the right templates or resources!
Step-by-Step Guide: How to Create Your Own Digital Planner
Building your own digital planner can feel like a big task, but with the right steps, it becomes a fun, creative project. Here’s a step-by-step breakdown to help you design your custom planner from scratch:
Step 1: Define Your Planner Purpose and Style
Identify Your Needs: Think about what you want to achieve with your planner. Are you tracking fitness goals, managing a side project, or simply organizing your daily life? This clarity helps you decide what sections and features are essential.
Choose Your Style: Visualize the planner’s look—minimalist, vibrant, or theme-based (like wellness or productivity). You can even look at planners online to get ideas on layout and design elements.
Example: If you’re looking to keep it minimal and easy to use, a basic daily layout with sections for notes, goals, and a checklist can be all you need. For something more detailed, add sections like finances, health tracking, or meal planning.
Step 2: Pick a Platform and Tools
Platform Selection: Decide if you’ll create your planner on an app like GoodNotes, Notion, or use design software like Canva or PowerPoint. Each platform has unique strengths:
GoodNotes and Notability: Ideal if you want to write by hand with a stylus.
Notion: Great for custom layouts and links, plus it works across devices.
Canva: For a visually rich planner with images, icons, and styled text.
Template Resources: Don’t hesitate to use existing templates as a foundation. Sites like Etsy offer affordable, customizable templates, or you can check out this fully customizable digital planner designed to save you time and offer flexibility.
Step 3: Design Your Layout and Pages
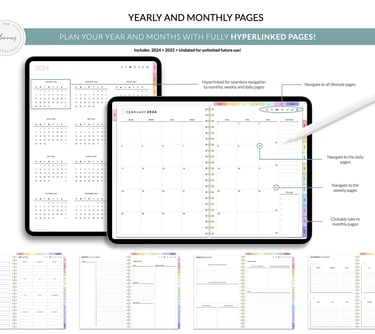
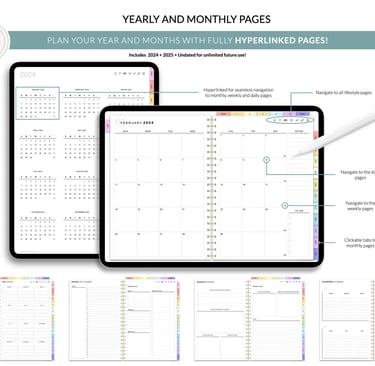
Core Pages: Start by creating the foundational pages—monthly overview, weekly spreads, and daily logs. These are the pillars of most planners.
Custom Pages: Add specific pages that suit your lifestyle, like habit trackers, goal-setting sheets, or a gratitude log.
Design Tips:
Spacing: Give sections room to breathe. Overcrowding pages makes them harder to use.
Color and Font: Choose consistent colors and fonts for a cohesive feel. A clean sans-serif font with muted tones can make your planner look professional.
Interactive Elements: Hyperlink pages or use navigation tabs for quick access.
Here’s a quick example setup:
Monthly Overview Page: Goals, top tasks, important dates.
Weekly Spread: Space for priorities, a quick glance at each day, and a notes section.
Daily Page: Sections for schedule, to-do list, and personal notes.
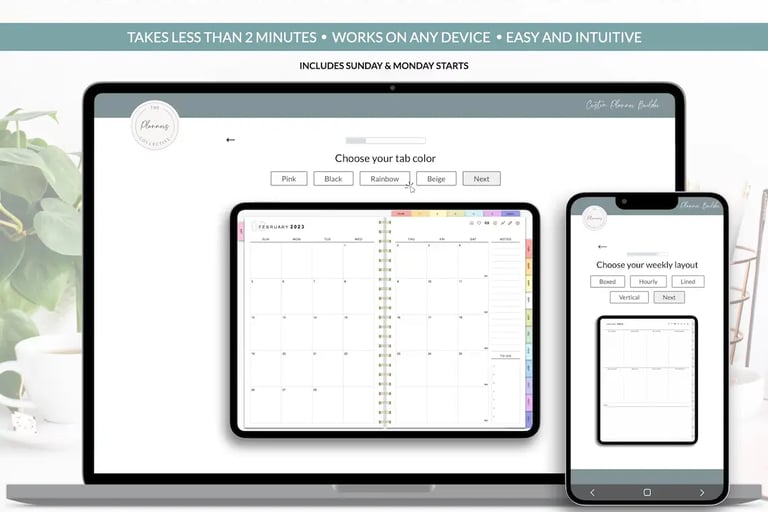
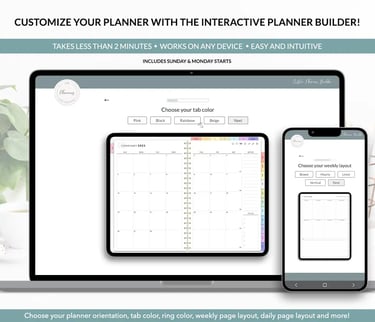
Creating these layouts in Canva or GoodNotes will give you flexibility, but remember—this can take time. For those who’d prefer a ready-made solution, our Build your own custom planner in under 2 minutes! offers a fully customizable layout that’s designed for immediate use.
Useful Tips for Personalizing Your Digital Planner
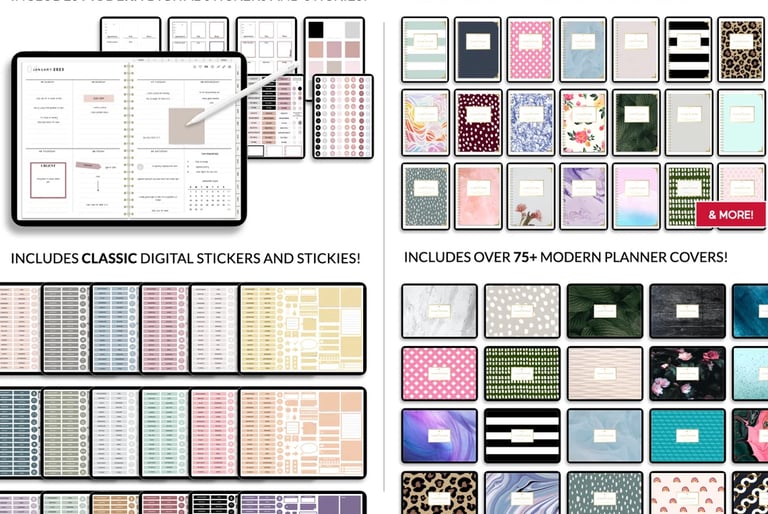
1. Use Stickers and Icons
Adding stickers or icons makes your planner more engaging and fun to use. Apps like GoodNotes have sticker packs, or you can find customizable options on sites like Etsy.
2. Incorporate Goal-Setting Frameworks
Use tried-and-true frameworks like SMART goals (Specific, Measurable, Achievable, Relevant, Time-Bound) to track progress. A goal-setting template within your planner can help you monitor and stay motivated.
3. Update Your Planner Regularly
Make a habit of updating your planner daily or weekly. A few minutes each morning or Sunday evening helps keep you organized and on top of your plans.
Building your digital planner takes time, but the end result—a fully personalized organization tool—is incredibly rewarding. And if you need a head start, our all-in-one customizable planner provides everything you need to get going quickly, without compromising on quality or design.
Adding Functional and Fun Elements to Your Digital Planner
Personalizing your digital planner isn’t just about aesthetics; adding functional and interactive elements can help you get the most out of your planning experience. Here’s how you can make your digital planner not only look great but work even better for you:
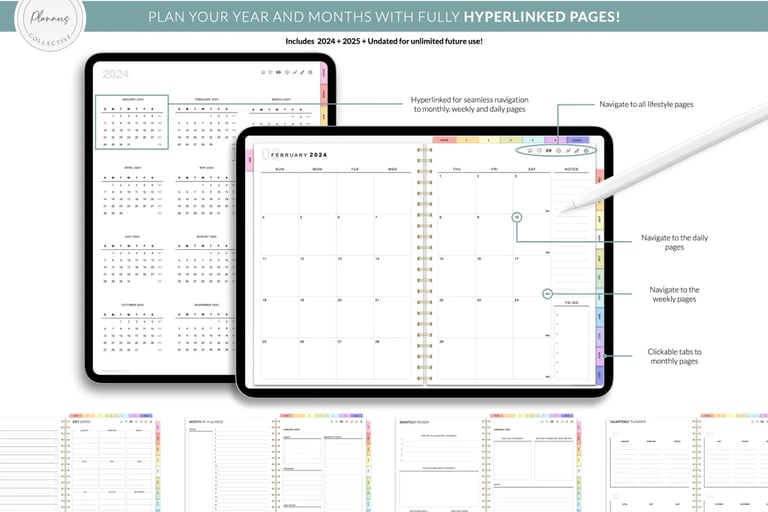
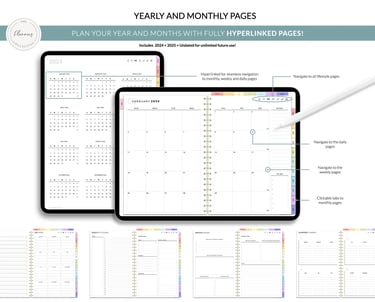
1. Hyperlinked Sections for Easy Navigation
Why: Hyperlinks allow you to jump between sections with a single tap, making navigation smooth and efficient. Especially useful in apps like Notion, which supports internal linking.
How to Add: In your digital planner software, create clickable links that connect main sections like “Monthly Overview” or “Goals.” If you’re using Build Your Own Custom Planner in Under 2 Minutes, it’s already set up with intuitive hyperlinks, making it easy to jump to the exact section you need.
2. Built-In Reminders for Important Deadlines
Why: Life gets busy! Reminders help you stay on top of deadlines, events, and priorities.
How to Add: Many planner apps let you set notifications directly. If you’re in Notion, you can set date reminders, or if you’re using an iPad, Apple Notes or GoodNotes can sync with your calendar.
3. Incorporate Habit Trackers for Accountability
Why: Habit tracking keeps you accountable, whether it’s exercise, hydration, or reading. Tracking daily habits visually also boosts motivation.
How to Add: Habit trackers can be as simple as a grid with checkboxes or dots to fill in each day. With Build your own custom planner in under 2 minutes!, you’ll find pre-made habit-tracking templates ready for customization.
Simple Tips for Maintaining Your Digital Planner
Creating a beautiful digital planner is only the first step—staying consistent with it is what really makes the difference. Here’s how to keep up with your planner and make it a regular part of your daily routine:
1. Set a Time to Plan Each Day
Just like a habit, the more you stick to a routine, the easier it gets. Try setting aside five minutes every morning or evening to update your planner. Consistency is key to forming this habit.
2. Review and Adjust Your Goals Weekly
Weekly reviews give you a chance to celebrate progress and make adjustments where needed. Use a weekly summary page to note what worked, what didn’t, and how you’ll improve next week.
3. Refresh Your Planner for Each New Month
At the start of each month, review your past goals and set fresh ones. This monthly reset keeps you focused and makes your planner feel new and exciting. Plus, a quick refresh helps avoid clutter and keeps everything streamlined.
Maintaining your planner doesn’t need to be complicated—just a few consistent habits can make it a powerful tool for achieving your goals. And if you’re ready for a planner that’s easy to stick with, check out the Build Your Own Custom Planner in Under 2 Minutes!. It’s designed to help you stay on track effortlessly.
Maximizing the Benefits of Your Digital Planner
With your digital planner up and running, the next step is making the most of it. Here’s how to harness its full potential and turn it into a tool for productivity, mindfulness, and personal growth.
1. Set Clear, Achievable Goals
Why: Having well-defined goals helps you prioritize what matters most. Start each week with a quick goal-setting session to align your focus.
How: Divide goals into daily, weekly, and monthly priorities. Use your planner’s “Goals” section to jot down action steps. Having a planner like Build Your Own Custom Planner in Under 2 Minutes! makes this easy with templates that guide you through each step.
2. Track Progress and Adjust Plans as Needed
Why: Tracking your progress helps you recognize wins and learn from setbacks. This ongoing feedback loop keeps you on course.
How: Use weekly or monthly summaries to document milestones. For example, add a “Monthly Reflection” section to review what went well and what could be improved. This simple habit not only boosts productivity but also increases motivation.
3. Incorporate Journaling for Personal Growth
Why: Journaling alongside planning is a powerful way to reflect on thoughts, record memories, and check in on your mental well-being.
How: Set aside space in your planner for daily or weekly journaling. With Build your own custom planner in under 2 minutes!, the integrated journaling templates provide a structured yet flexible approach to writing down your thoughts and emotions.
Conclusion: Start Building Your Digital Planner Today
Creating your own digital planner is a game-changer for personal productivity and organization. With a personalized digital planner, you can tailor every page to suit your unique needs, stay consistent with your goals, and adapt quickly as priorities change.
If you’re ready to start your journey with a versatile, customizable digital planner that’s quick to set up, check out Build Your Own Custom Planner in Under 2 Minutes!. This all-in-one tool has everything you need to kickstart your planning journey, with templates for 2024, 2025, and beyond.
Explore our notion digital planners
Connect
Support
SQUART LLC
629 Maple Valley Dr, Farmington, Missouri 63640, États-Unis
Téléphone : +1 (234) 279-7152
E-mail : contact@squart-llc.com
© 2024. All rights reserved.